Hair steaming is perhaps one of the most underrated hair maintenance routines.
I can count the number of times I have steamed my hair (It could use some increment, lol).
Each time I do, however, the difference is indisputable.
What is hair steaming?
How should you steam your hair?
What are the benefits of hair steaming and its disadvantages?
These will be discussed below!
Like the title promises, you will be getting all you need to know about hair steaming.
So let’s get to it. What is hair steaming?

What’s Hair Steaming?
It is the process of applying moist heat to the hair, which is followed by hair hydration and many other benefits that we’ll be considering later.
Keep in mind that hair steaming can be done for both natural and relaxed hair.
To get the full benefits of hair steaming, it has to be done right.
Here’s how:
How to Steam Hair
There are two methods you can use for hair steaming:
- The hot towel method
- The dryer method

Hot Towel Method
This method is used in the absence of a hairdryer or steamer and is conventional.
That means you can easily DIY at home without any special equipment.
To use the hot towel method, take the following steps:
1. Wash Hair
You should wash your hair before steaming as dirt and particles can prevent the conditioner or hair oil, as the case may be, from sinking deep in your hair.
A dirty scalp would also prevent sealing in moisture in the hair follicles.
Here are a few tips to keep in mind for hair washing before steaming:
- Wash at least a day before steaming
- Make use of warm water
2. Apply Moisturizer
Here is where it is mostly up to you.
You could decide to use a readymade conditioner or prepare a conditioner using simple ingredients; either would be best if you have dry hair.
Some hairstylists mix the steaming powder with other ingredients for this purpose.
As long as you can get it from a good source, this is a great idea.
You may also decide to use hair oils; coconut oil, almond oil, or olive oil are great options.
You could experiment with different options to know which works best for your hair.
A few things are not up to you, though:
- You should apply it from hair roots to hair ends.
- Ensure that you apply evenly throughout.
3. Cover with Shower Cap
In the absence of a shower cap, you can use a plastic bag to cover your hair.
It is always best, however, to use a shower cap. If your hair is long such that it falls underneath the shower cap, tie up your hair loosely.
Ensure that no strands are left outside the shower cap.
4. Steam Towel
After placing your hair under the shower cap, grab a portable towel, and soak with water.
Then squeeze it out thoroughly such that you no longer see water dripping.
This is essential as you will be steaming the cloth, and any water drips left may burn you when you place them on your hair.
You don’t want to sustain burns while doing a good deed for your hair.
After squeezing it out thoroughly, place the towel in a microwave, and turn it on to the highest temperature.
Leave it for two minutes, after which it must be hot enough, and then remove.
Be careful when removing the hot towel; remember, you don’t want to sustain burns.
Advisably, use hand protectors like gloves or potholders.
If you do not have a microwave, you can steam the towel by dipping it in a kettle of hot water.
Drain the water, wait for a few minutes, and squeeze out the towel.
You would have to be extra careful to squeeze it thoroughly, though, probably have a bowl of cold water next to you where you can occasionally dip your hand.
It is always best to use a microwave and not take this risk.
5. Set Steamed Towel on Shower Cap
The next step is to place the steamed towel on the shower cap you wore earlier.
Ensure that you place it in a position that doesn’t allow it to slip easily. Keep your hand protectors on while taking this step.
6. Cover with Shower Cap
Again, wear a shower cap, this time on the towel.
The shower cap covering the steamed towel helps prevent the steam from escaping and instead steams the hair under.
7. Leave for 30 Minutes
This is the amount of time your hair strands need to take in the steam.
So grab a dry face cloth, sit still, probably keep yourself busy with your phone or a book.
This would be a nice time to enjoy music from wireless earbuds or headphones while you wait for the steam and your hair to do their thing.
The dry face cloth will be useful just if you feel water dripping from your hair while sitting. Then you can easily wipe it off.
8. Wash with Cold Water
After 30 minutes of hair steaming, remove the shower caps and towel, and untie your hair if you had tied it before.
Then, enjoy the refreshing feeling as you wash your hair with cold water.
Let the water fall on your hair with high pressure and stroke gently as you wash; this helps to push out whatever moisturizer you may have applied, making your hair clean.
But you did not put them pointlessly. The cold water locks in the moisture and seals your hair cuticles.
9. Air Dry
Allow your hair to dry naturally; do not use a dryer.
This might take hours, depending on your hair’s texture and the weather, but it is worth the time.
Using a dryer might cause heat damage to your hair.

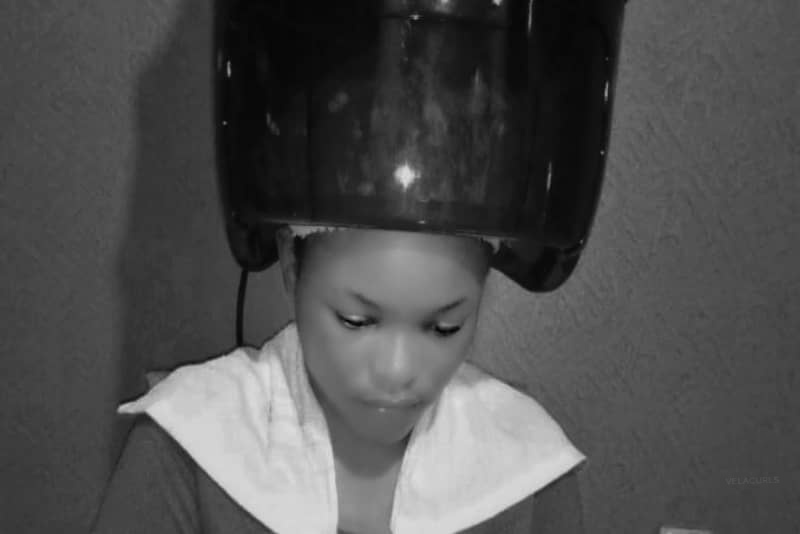
Dryer/Steamer Method
As the name implies, this hair steaming process is carried out using a dryer or a steamer.
You need a steamer, but because most overhead dryers have a steam setting, they would do.
So if you have access to a dryer/steamer, you can follow these steps to steam your hair:
1. Wash Hair
As mentioned earlier, you should wash your hair at least a day before steaming.
Of course, this applies whether you are using the hot towel method or this method.
2. Apply Moisturizer
Moisturize your hair using a readymade or homemade conditioner or your preferred hair oil.
Whatever you use, ensure that you apply it to all areas of your hair, and don’t forget to start at the hair roots.
3. Set Dryer
Set your hairdryer to the steam setting and place your head inside.
In the absence of steam setting on your dryer, turn the setter to low heat, not more than 20 degrees Celsius.
With a steamer, ensure there is water in it, turn it on, and you are good to go.
Most salons have at least either a dryer or steamer, so you can alternatively contact your local salon and pay to use theirs if they will allow it.
4. Set Hair under Dryer
Place your head in the dryer for about 20 minutes. Ensure that all your hair is under the dryer and tuck in all dangling hair strands.
5. Wash with Cold Water
After 20 minutes, turn off the dryer, get in the shower, and let the cold water do its job.
As you wash, gently give your hair a stroke to help push the moisturizer down your hair.
6. Air Dry
Leave your hair to dry naturally and enjoy the refreshing feeling that comes after hair steaming!
Benefits of Hair Steaming
Having considered how to carry out hair steaming at home, let’s see some of the many benefits of hair steaming:
1. Keeps Scalp Healthy
When you steam your hair, it helps to open clogged pores on your scalp, thereby making it clean and enhancing hair growth.
Hair steaming treatment also increases the production of natural oils in the scalp keeping it healthy.
2. Moisturizes Hair
Hair steaming is simply the application of moist heat to the hair.
Reasonably then, your hair is moisturized each time you steam, and this also enhances hair growth.
Your hair being moisturized isn’t something you just read about; you feel it, see it. Your hair looks healthy and shiny!
3. Increases Effectiveness of Hair Treatments
Steaming the hair opens up your hair cuticle, making it easier for any hair products you use after that to get to your hair shafts.
Hence, hair treatments work more effectively on your hair because your hair would be in an excellent position to receive them.
4. Helps Prevent Breakage
Hair dryness eventually leads to breakage.
Hair steaming is a great way to prevent this as the moist heat applied prevents your hair from being dry and breaking eventually.
5. Enhances Hair Elasticity
Hair elasticity is simply the ability of your hair to bend and stretch without causing breakage.
The moisture absorbed during hair steaming helps to improve your hair’s elasticity.
This means that you can rock your twists, curls, and kinks without fear of losing a substantial amount of your hair or your hair breaking.
6. Promotes Blood Circulation
Hair steaming promotes the circulation of blood around your scalp area. This, in turn, contributes to hair growth.
7. Minimizes Hair Dryness
Some people have dry hair naturally, and most of them would testify that it isn’t all that enjoyable.
A great way to minimize such dryness is to provide the hair with moisture from time to time; regular hair steaming does just that.
8. Reduces Dandruff
Mostly when done with a steamer, hair steaming is a way to reduce dandruff.
One cause of dandruff is the presence of the fungus Malassezia on the scalp.
The heat generated on the hair during steaming can kill this yeast-like fungus.
Another major cause of dandruff is scalp dryness.
With regular steaming, your scalp becomes hydrated, giving no room for dandruff.
9. Cleanses Hair
With the necessity of hair washing before and steaming, there is absolutely no room for dirt on your hair after steaming.
The steaming process also helps to easily remove remnants from the gel, spray, and other products that inevitably contact the hair.
It leaves your hair neat and clean!
Disadvantages of Hair Steaming
Like many other hair treatment processes, hair steaming has its downsides.
The good thing, though, is that these disadvantages are avoidable, as would be explained below:
1. Weak Hair
Steaming can cause your hair to become weak when you do it more often than necessary.
This is because your hair becomes over-moisturized.
Especially if you do not have dry hair, you should limit how often you steam to avoid weak hair.
The general rule is to steam once a week for dry hair and once a month for generally healthy hair.
2. Hair Damage
Overexposure to steam can lead to hair damage; our hair and heat are not good friends.
Overexposure begins when you steam your hair for more than 30 minutes at a stretch.
Therefore, to avoid hair damage, steam for 30 minutes at most.
3. Scalp Damage
Hot temperatures can damage your scalp as much as they can cause damage to the hair.
The way out? Do not steam for too long.
4. Split Ends
When some hair strands are left dangling outside the steamer, most likely the hair ends, they do not receive the benefits of hair steaming.
This leads to those ends looking less healthy than the rest.
You can easily avoid this by ensuring that all parts of your hair are under the hair steaming cap or dryer, as the case may be.
Extra Tips for Hair Steaming
Here are a few more things you need to know about hair steaming:
- You should not steam with oil if you have a flaky scalp.
- Use a conditioner instead, or better still, treat the condition before you steam.
- Hair on which coloring has been applied can benefit from steaming.
- Hair transitioning from relaxed to natural will benefit highly from steaming.
Conclusion
Just as a tree needs water to grow and stay healthy, your hair also needs moisture for growth.
Steaming it provides just that!
The inner satisfaction that comes from having beautiful, healthy hair cannot be overemphasized.
In addition, it makes you neat and clean, and this satisfies one of the requirements on how to be a good girl.
Do it in the right way, for the right time, with the right ingredients, and enjoy the many benefits that come from hair steaming!
Niiiice.
Thank you, Tobi.
Well written, sounds like one who knows their subject
Thank you very much. I guess I had enough time to learn.
Waoh. This is awesome. I love this write-up. In those days, we use to steam our hair the same day we washed it. Thank you for this correction. I want to add that you can only steam your hair at least a week after relaxing/retouching it. I hope to learn more from you. Weldone for the progress so far.
I really appreciate your comment. Kindly do not hesitate to drop more tips in the future. Thanks!
I have to share this with my future wife!
Well written! Nice flow!
Lol, please do! Thank you, Tomvad.
Wow!
Great Write-up
Thank you!
Thank you so much! It’s helpful.
I’m glad it helped! Thanks for stopping by, Jane.
I’m impressed. Well-done dear friend.
Wow,interesting,
I tink i would try this,pretty sure i would love it,
Tnk yhu Vela